Bookingor – WordPress Booking plugin
  • Features
  • Demo
  • Pricing
  • Login
  • Get Bookingor

Getting Started

4
  • Install Bookingor
  • Activate Bookingor
  • All Shortcodes
  • Updating Bookingor Plugin

Integration

3
  • Google Calendar
  • Stripe Payment Integration
  • Woocommerce Integration

Settings

5
  • Integration Settings
  • Email Settings
  • Basic Settings
  • Payment Settings
  • Role Settings

Services

8
  • Assign Staff in Services
  • Assign Location in Service
  • Add Subcateogry in Service
  • Service Hours
  • Add Services
  • Edit Services
  • Delete Services
  • Add Extra

Category

6
  • Add Subcategory
  • Update Subcategory
  • Add Category
  • Subcategory
  • Edit Category
  • Delete Category

Staff

6
  • Add Staff
  • Edit Staff
  • Delete Staff
  • Staff Hours
  • Special Days
  • Holidays

Location

4
  • Add Location
  • Edit Location
  • Remove Location
  • Location Hours

Notifications

1
  • Email Notifications

Style Templates

1
  • Live Editor Templates
View Categories
  • Home
  • Documentation
  • Location
  • Add Location
Add Location

1 min read

Instruction Manual: Adding a Location in Bookingor


Step 1: Log into WordPress Admin Panel

  1. Open your web browser and go to your WordPress site.
  2. Log in using your administrator credentials.

Step 2: Access the Bookingor Plugin

  1. Once logged in, navigate to the WordPress Dashboard.
  2. In the sidebar menu, locate and click on the Bookingor plugin.

Step 3: Go to the Locations Section

  1. Within the Bookingor plugin menu, find and select the "Locations" submenu.

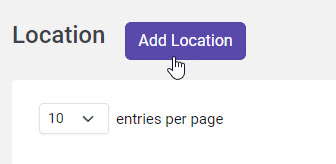
Step 4: Add a New Location

  1. In the Locations section, click on the "Add Location" button. This will open a popup window for entering location details.

Step 5: Fill in Location Details in the Basic Tab

  1. In the popup window, navigate to the Basic Tab.
  2. Name: Enter the name of the location (e.g., "Main Spa Location").
  3. Title: Provide a title for the location (e.g., "Spa & Wellness Center").
  4. Country: Select the country where the location is situated.
  5. City: Enter the city name (e.g., "New York").
  6. Phone Number: Input a contact phone number for the location (e.g., "+1 123 456 7890").
  7. Address: Enter the complete address for the location (e.g., "111 5th Avenue").
  8. Street Address: Specify the street address if it differs from the main address (e.g., "5th Ave").
  9. Latitude: Provide the latitude coordinate of the location for mapping purposes.
  10. Longitude: Provide the longitude coordinate of the location for mapping purposes.
  11. Location Image: Click on the Upload Image button to add a relevant image for the location.

Step 6: Save the New Location

  1. After filling in all the required fields, click on the "Save" or "Add Location" button to finalize the addition of the new location.

Additional Note:

  • Ensure all entered details are accurate to provide customers with the correct information about the location.

This guide will help you successfully add a new location in Bookingor.

Updated on September 30, 2024

What are your Feelings

  • Happy
  • Normal
  • Sad
Share This Article :
  • Facebook
  • X
  • LinkedIn
  • Pinterest
Product
  • Demo
  • Features
  • Pricing
Best for
  • Salon Industry
  • Barber Industry
Resources
  • Documentation
  • Changelog
  • Contact Support
  • Blog
Company
  • About
  • Privacy Policy
  • Terms and Conditions
  • Refund Policy
  • Bookingor Affiliate Program
Bookingor – WordPress Booking plugin
Bookingor is Wordpress Booking plugin and best Booking Appointment Scheduling plugin with Reservation. Fully customizable, allowing you to tailor it to your specific needs. Our plugin offers a range of features to meet your requirements. Developed under by The Creative Next.
© Copyright 2025 | Bookingor by The Creative Next | All Rights Reserved