Step 1: Log into the WordPress Admin Panel
- Open your web browser and go to your WordPress site.
- Log in using your administrator credentials.
Step 2: Access Bookingor Plugin
- Once logged in, navigate to the WordPress Dashboard.
- In the sidebar menu, find and click on the Bookingor plugin.
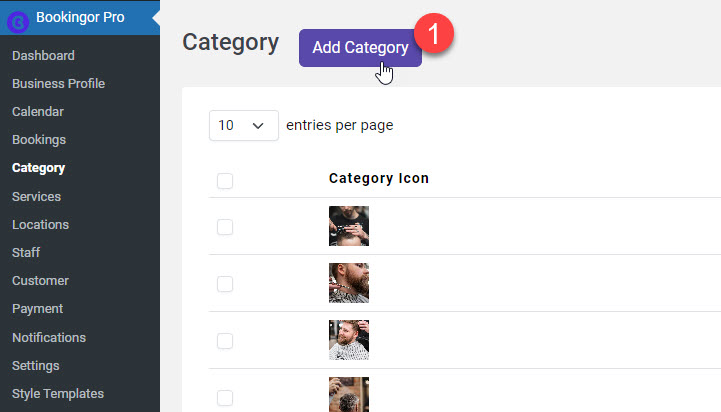
Step 3: Go to Category Panel
- In the Bookingor section, click “Category” from the dropdown menu.
Step 4: Add a New Category
- On the Categories page, you will see an option to Add Category on the very top Near Heading.
- Click on the Add New Category button.
Step 5: Fill in the Category Details
- Category Name: Enter the name of the category you want to add. For example, "Massage Therapy" or "Hair & Styling."
- Icon/Thumbnail (Optional): Upload an image or icon that represents the category.
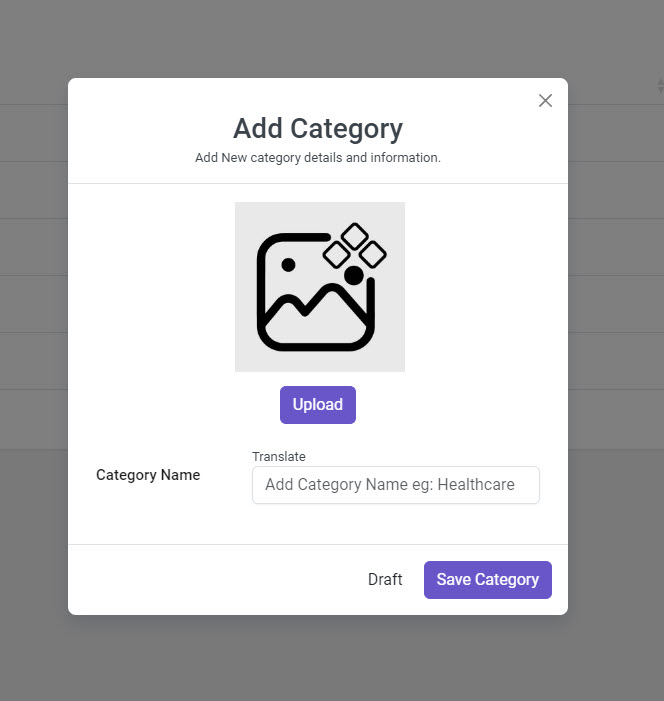
Step 6: Save the New Category
- Once you have filled in all the necessary information, click on the Save button.
- You will receive a confirmation message once the category is successfully added.
Additional Notes:
If you want to edit or delete a category later, simply return to the Category section and modify the entries.
You can add unlimited categories and subcategories to Bookingor.
Categories help you organize your services for easier navigation by clients.


Leave a Reply