Bookingor – WordPress Booking plugin
  • Features
  • Demo
  • Pricing
  • Login
  • Get Bookingor

Getting Started

4
  • Install Bookingor
  • Activate Bookingor
  • All Shortcodes
  • Updating Bookingor Plugin

Integration

3
  • Google Calendar
  • Stripe Payment Integration
  • Woocommerce Integration

Settings

5
  • Integration Settings
  • Email Settings
  • Basic Settings
  • Payment Settings
  • Role Settings

Services

8
  • Assign Staff in Services
  • Assign Location in Service
  • Add Subcateogry in Service
  • Service Hours
  • Add Services
  • Edit Services
  • Delete Services
  • Add Extra

Category

6
  • Add Subcategory
  • Update Subcategory
  • Add Category
  • Subcategory
  • Edit Category
  • Delete Category

Staff

6
  • Add Staff
  • Edit Staff
  • Delete Staff
  • Staff Hours
  • Special Days
  • Holidays

Location

4
  • Add Location
  • Edit Location
  • Remove Location
  • Location Hours

Notifications

1
  • Email Notifications

Style Templates

1
  • Live Editor Templates
View Categories
  • Home
  • Documentation
  • Settings
  • Email Settings
Email Settings

1 min read

Instruction Manual: Email Settings in Bookingor


Step 1: Log into WordPress Admin Panel

  1. Open your web browser and go to your WordPress site.
  2. Log in using your administrator credentials.

Step 2: Access the Bookingor Plugin

  1. From the WordPress Dashboard, locate and click on the Bookingor plugin in the sidebar menu.

Step 3: Navigate to Settings

  1. In the Bookingor plugin, find and click on the "Settings" submenu.
  2. Within the Settings page, select the "Email Settings" tab.

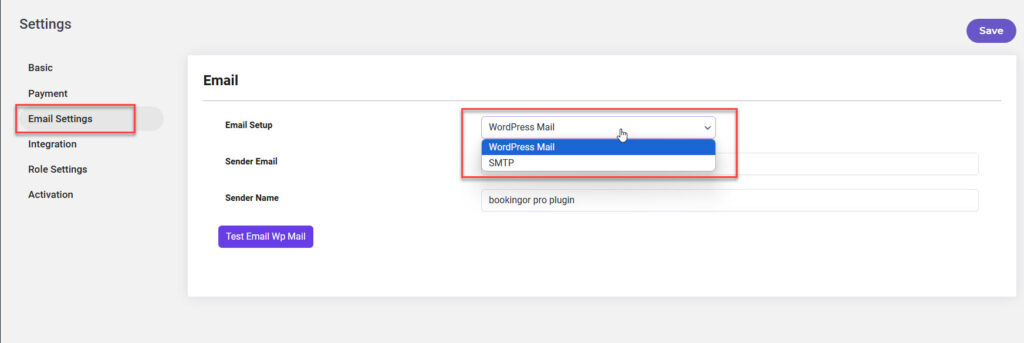
Step 4: Configure Email Setup

  1. You will see two options for email setup:
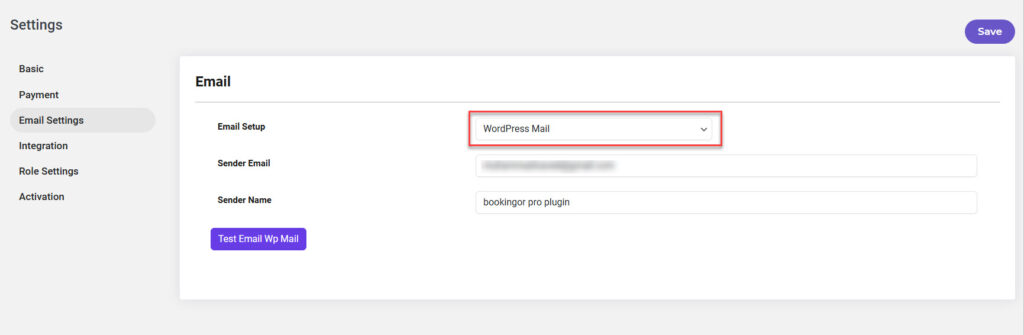
  • Email Setup: WordPress Mail
    • Sender Email: Input the email address you want emails to be sent from.
    • Sender Name: Enter the name that will appear as the sender in the recipient's inbox.
  • Email Setup: SMTP
    • SMTP Host: Enter the SMTP server address (e.g., smtp.your-email-provider.com).
    • SMTP Port: Specify the port number (e.g., 587 for TLS, 465 for SSL).
    • SMTP Username: Enter your email address used for SMTP.
    • Email Name: Provide the name that will appear in the sender field.
    • Password: Enter the password for the SMTP email account.

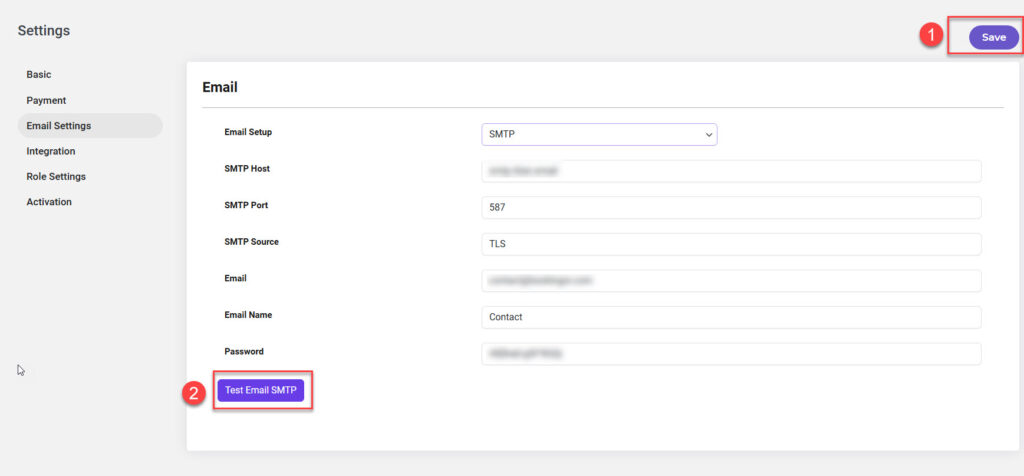
Step 5: Save Changes

  1. Once you have configured all the email settings and tested them, make sure to save your changes by clicking on the "Save Changes" button.

Step 6: Test Email Configuration

  1. After filling in the appropriate email setup fields, locate the "Test Email" button.
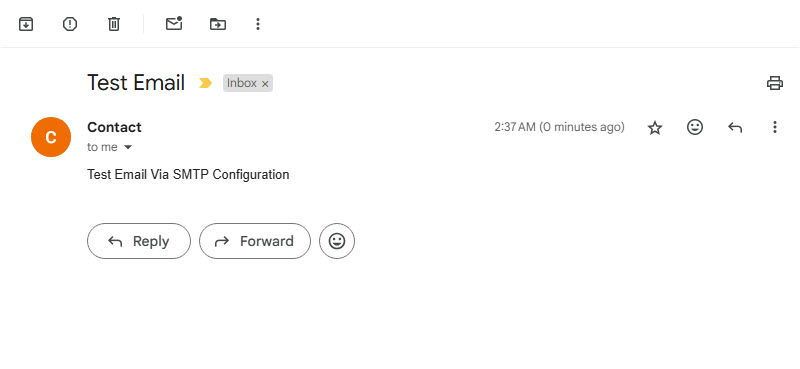
  2. Click on this button to send a test email and verify that the email settings are correctly configured.
  3. Check the recipient inbox to confirm the test email was received.

Additional Notes:

  • Ensure that the sender email is a valid email address to avoid delivery issues.
  • Using SMTP can enhance email deliverability compared to the default WordPress email method.

This guide provides the necessary steps to configure and test your email settings in Bookingor effectively.

Updated on April 3, 2025

What are your Feelings

  • Happy
  • Normal
  • Sad
Share This Article :
  • Facebook
  • X
  • LinkedIn
  • Pinterest
Basic SettingsIntegration Settings
Product
  • Demo
  • Features
  • Pricing
Best for
  • Salon Industry
  • Barber Industry
Resources
  • Documentation
  • Changelog
  • Contact Support
  • Blog
Company
  • About
  • Privacy Policy
  • Terms and Conditions
  • Refund Policy
  • Bookingor Affiliate Program
Bookingor – WordPress Booking plugin
Bookingor is Wordpress Booking plugin and best Booking Appointment Scheduling plugin with Reservation. Fully customizable, allowing you to tailor it to your specific needs. Our plugin offers a range of features to meet your requirements. Developed under by The Creative Next.
© Copyright 2025 | Bookingor by The Creative Next | All Rights Reserved