Instruction for Adding Staff in Bookingor
This guide will help you add a new staff member to your Bookingor system.
Step 1: Log into WordPress Admin Panel
- Open your web browser and go to your WordPress site.
- Log in using your administrator credentials.
Step 2: Access the Bookingor Plugin
- In the WordPress Dashboard, locate and click on the Bookingor plugin from the sidebar menu.
Step 3: Go to Staff Management
- Within the Bookingor plugin, find and select the "Staff"section.
Step 4: Click on "Add Staff Member"
- Look for the "Add Member" button and click it to start adding a new staff member.
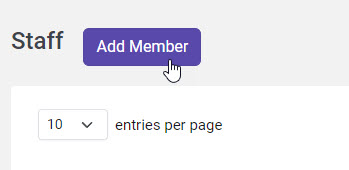
Staff Page
Step 5: Go to Basic Detail Tab
- In the staff member creation interface, navigate to the "Basic Details" tab at the left.
Step 6: Fill in Staff Member Details
- First Name: Enter the staff member’s first name (e.g., John).
- Last Name: Enter the staff member’s last name (e.g., Doe).
- Phone: Input the staff member’s phone number (e.g., +00 000 000).
- Email: Enter the staff member’s email address (e.g., me@gmail.com).
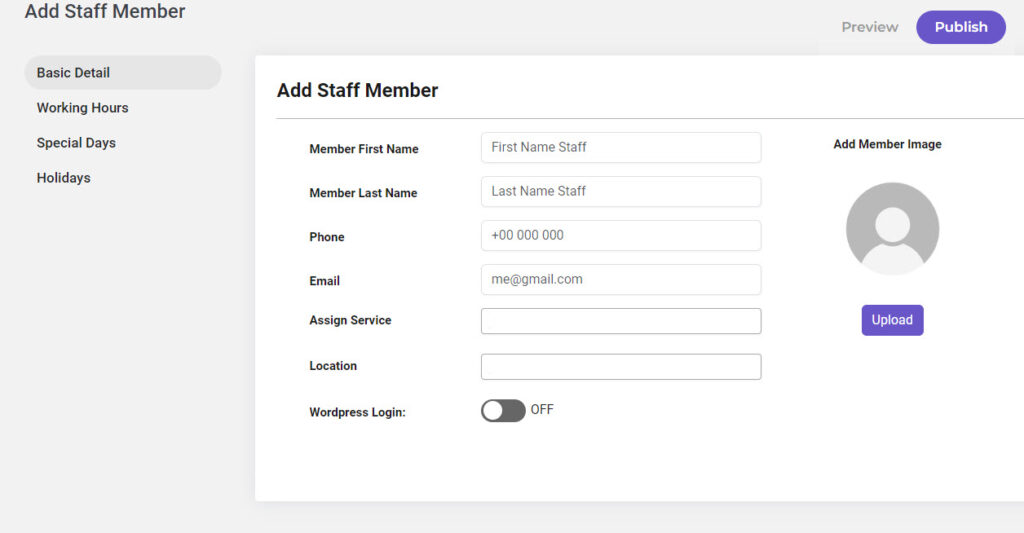
Step 7: Upload Staff Member Image (Optional)
- Click on the Upload button.
- Upload an image for the staff member by selecting a file from your computer.
Step 8: Assign Services
- In the Assign Service section, select the services that the staff member will provide from the dropdown list.
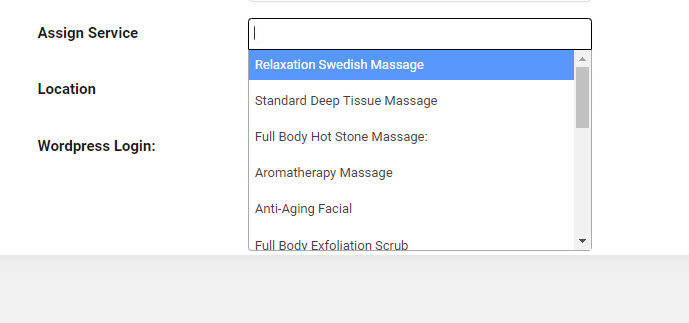
Step 8.1: Check Assign Services
- In the Assign Services section, look for the dropdown menu that lists available services.
- If the dropdown is empty, this means no services have been created yet.
Step 8.2: Create Services if Needed
- If the Assign Services dropdown is empty:
- Navigate to the Services section in the Bookingor plugin.
- Follow the instructions to add the necessary services.
- Make sure to save the new services.
Step 8.3: Assign Services
- Once services have been created, return to the Staff Member Details tab.
- Click on the dropdown menu in the Assign Services section.
- Select the appropriate services you want to assign to the staff member.
- You can select multiple services as needed.
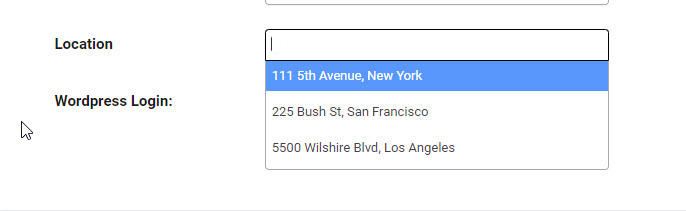
Step 9: Set Staff Location
- In the Location section, select the appropriate location for the staff member.
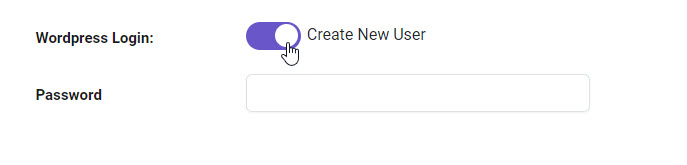
Step 10: Create New User (Optional)
- If you want to create a WordPress user for the staff member, check the Create New User option.
- Username: Enter a unique username for the staff member.
- Password: Set a password for the new user account.
Step 11: Save Changes
- After filling in all the required information, scroll to the bottom of the page.
- Click the Save or Add Staff Member button to complete the process.
Additional Notes:
- Ensure that all required fields are filled out correctly to avoid any issues with staff assignments.
- It's a good practice to upload a clear and professional image of the staff member for better representation.


Leave a Reply