Instruction Manual: Updating Subcategory in Bookingor
Step 1: Log into WordPress Admin Panel
- Open your web browser and navigate to your WordPress site.
- Log in using your administrator credentials.
Step 2: Access Bookingor Plugin
- Once logged in, go to the WordPress Dashboard.
- In the sidebar menu, locate and click on the Bookingor plugin.
Step 3: Go to Category Management
- Inside the Bookingor plugin, select the “Category” section.
Step 4: Find the Category to Update
- On the Categories page, browse the list of existing categories.
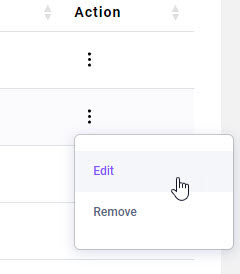
- go to the action and click on 3 dots Click the Edit button next to the category you want to modify.
Step 5: Open the Update Category Window
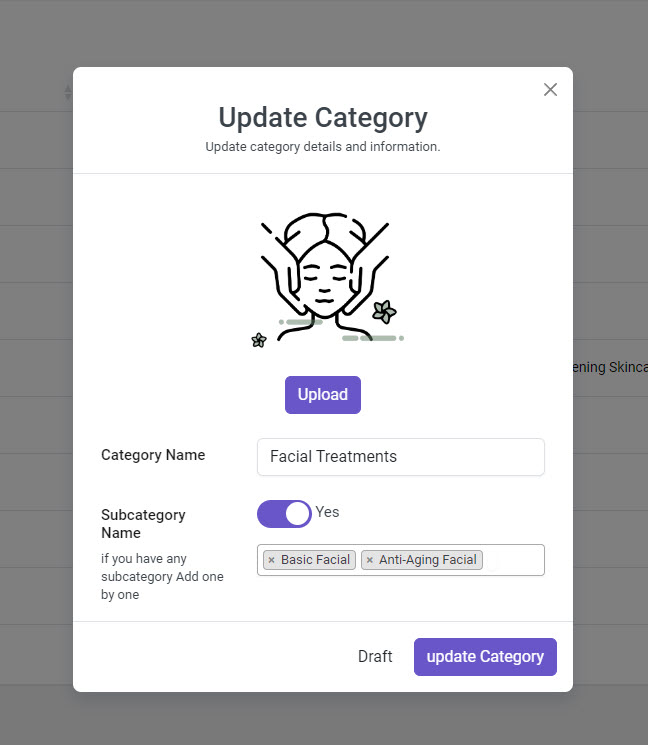
- A window titled "Update Category" will appear, as shown in the image above.
Step 6: Modify Subcategories
- Toggle Subcategory: Ensure that the "Add Subcategory" toggle is switched to Yes (enabled).
- Edit Subcategories: In the Subcategory Name section, you will see the current subcategories (e.g., "Basic Facial", "Anti-Aging Facial").
- To add a subcategory, type the name of the new subcategory in the input field and press Enter or comma.
- To remove a subcategory, click the X next to the subcategory name.
- You can add or remove as many subcategories as needed.
Step 7: Upload or Change Image
- If desired, click the Upload button to change the category image or icon.
Step 8: Save the Updated Category
- After making the necessary changes, click on the Update Category button.
- A confirmation message will appear once the category and subcategory updates are successfully saved.
Step 9 (Optional): Save as Draft
- If you are not ready to publish the changes yet, click the Draft button to save the category as a draft. You can return later to finalize the updates.
Additional Notes:
- Make sure to review your changes before saving the updated category.
- You can use this method to update any category or subcategory at any time.
- Changes will reflect immediately on the front end once you update the category.
This guide helps you smoothly update your categories and subcategories within Bookingor.


Leave a Reply