Bookingor – WordPress Booking plugin
  • Features
  • Demo
  • Pricing
  • Login
  • Get Bookingor

Getting Started

4
  • Install Bookingor
  • Activate Bookingor
  • All Shortcodes
  • Updating Bookingor Plugin

Integration

3
  • Google Calendar
  • Stripe Payment Integration
  • Woocommerce Integration

Settings

5
  • Integration Settings
  • Email Settings
  • Basic Settings
  • Payment Settings
  • Role Settings

Services

8
  • Assign Staff in Services
  • Assign Location in Service
  • Add Subcateogry in Service
  • Service Hours
  • Add Services
  • Edit Services
  • Delete Services
  • Add Extra

Category

6
  • Add Subcategory
  • Update Subcategory
  • Add Category
  • Subcategory
  • Edit Category
  • Delete Category

Staff

6
  • Add Staff
  • Edit Staff
  • Delete Staff
  • Staff Hours
  • Special Days
  • Holidays

Location

4
  • Add Location
  • Edit Location
  • Remove Location
  • Location Hours

Notifications

1
  • Email Notifications

Style Templates

1
  • Live Editor Templates
View Categories
  • Home
  • Documentation
  • Staff
  • Holidays
Holidays

1 min read

Instruction Manual: Setting Holidays in Bookingor


Step 1: Log into WordPress Admin Panel

  1. Open your web browser and go to your WordPress site.
  2. Log in using your administrator credentials.

Step 2: Access the Staff Section

  1. Once logged in, navigate to the WordPress Dashboard.
  2. In the sidebar menu, locate and click on the Staff section.

Step 3: Add or Edit Staff

  1. In the Staff section, either click on the "Add Staff" button to create a new staff member or select an existing staff member from the list to "Edit" their details.

Step 4: Navigate to the Holiday Tab

  1. After selecting or adding a staff member, find and click on the "Holiday" tab to manage holiday settings.

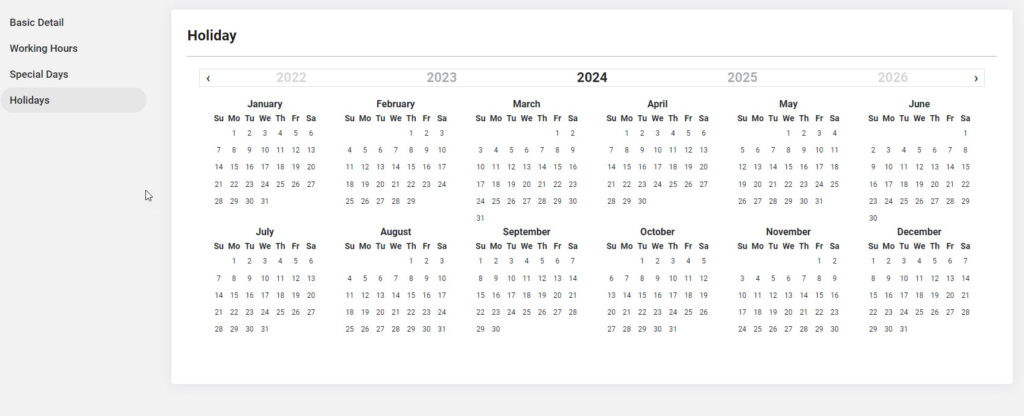
Step 4: Access the Yearly Calendar

  1. In the Holidays section, you will see a yearly calendar displayed.
  2. This calendar allows you to view and manage holidays throughout the year.

Step 5: Select a Date from the Calendar

  1. Navigate through the calendar to find the month and year you want to add a holiday.
  2. Click on the specific date you want to mark as a holiday.
  • The selected date will typically be highlighted or marked for confirmation.

Step 6: Save Holiday Settings

  1. Once all information has been entered, click the "Save" or "Update" button to apply the holiday settings.

Additional Notes:

  • Holiday Management: Setting holidays ensures that staff and clients are aware of unavailable days, helping to avoid scheduling conflicts.
  • Multiple Holidays: You can select multiple dates throughout the year to mark as holidays by repeating the process.

This guide helps you efficiently manage holidays within the Bookingor plugin, ensuring clear communication of unavailable dates for both staff and clients.

Updated on September 30, 2024

What are your Feelings

  • Happy
  • Normal
  • Sad
Share This Article :
  • Facebook
  • X
  • LinkedIn
  • Pinterest
Product
  • Demo
  • Features
  • Pricing
Best for
  • Salon Industry
  • Barber Industry
Resources
  • Documentation
  • Changelog
  • Contact Support
  • Blog
Company
  • About
  • Privacy Policy
  • Terms and Conditions
  • Refund Policy
  • Bookingor Affiliate Program
Bookingor – WordPress Booking plugin
Bookingor is Wordpress Booking plugin and best Booking Appointment Scheduling plugin with Reservation. Fully customizable, allowing you to tailor it to your specific needs. Our plugin offers a range of features to meet your requirements. Developed under by The Creative Next.
© Copyright 2025 | Bookingor by The Creative Next | All Rights Reserved