Bookingor
  • Features
  • Playground
  • Demo
  • Pricing
  • Login
  • Get Bookingor

Getting Started

4
  • Update Bookingor
  • Install Bookingor
  • Activate Bookingor
  • All Shortcodes

Integration

3
  • Google Calendar
  • Stripe Payment Integration
  • Woocommerce Integration

Settings

5
  • Integration Settings
  • Email Settings
  • Basic Settings
  • Payment Settings
  • Role Settings

Services

8
  • Assign Staff in Services
  • Assign Location in Service
  • Add Subcateogry in Service
  • Service Hours
  • Add Services
  • Edit Services
  • Delete Services
  • Add Extra

Category

6
  • Add Subcategory
  • Update Subcategory
  • Add Category
  • Subcategory
  • Edit Category
  • Delete Category

Staff

6
  • Add Staff
  • Edit Staff
  • Delete Staff
  • Staff Hours
  • Special Days
  • Holidays

Location

4
  • Add Location
  • Edit Location
  • Remove Location
  • Location Hours

Notifications

1
  • Email Notifications

Style Templates

1
  • Live Editor Templates
View Categories
  • Home
  • Documentation
  • Location
  • Add Location
Add Location

1 min read

Instruction Manual: Adding a Location in Bookingor


Step 1: Log into WordPress Admin Panel

  1. Open your web browser and go to your WordPress site.
  2. Log in using your administrator credentials.

Step 2: Access the Bookingor Plugin

  1. Once logged in, navigate to the WordPress Dashboard.
  2. In the sidebar menu, locate and click on the Bookingor plugin.

Step 3: Go to the Locations Section

  1. Within the Bookingor plugin menu, find and select the "Locations" submenu.

Step 4: Add a New Location

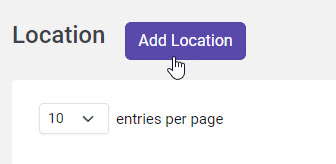
  1. In the Locations section, click on the "Add Location" button. This will open a popup window for entering location details.
Step 5: Fill in Location Details in the Basic Tab

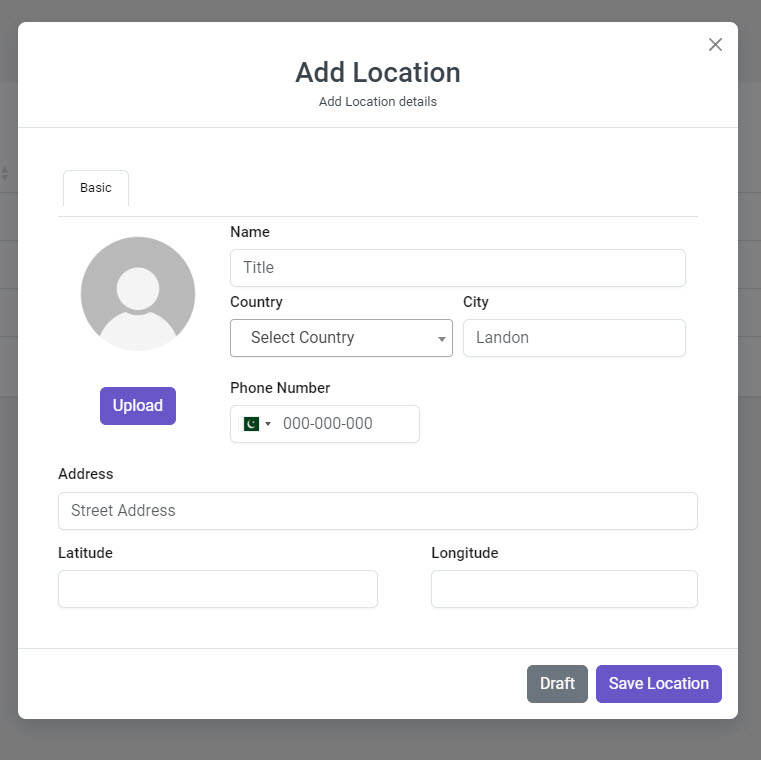
  1. In the popup window, navigate to the Basic Tab.
  2. Name: Enter the name of the location (e.g., "Main Spa Location").
  3. Title: Provide a title for the location (e.g., "Spa & Wellness Center").
  4. Country: Select the country where the location is situated.
  5. City: Enter the city name (e.g., "New York").
  6. Phone Number: Input a contact phone number for the location (e.g., "+1 123 456 7890").
  7. Address: Enter the complete address for the location (e.g., "111 5th Avenue").
  8. Street Address: Specify the street address if it differs from the main address (e.g., "5th Ave").
  9. Latitude: Provide the latitude coordinate of the location for mapping purposes.
  10. Longitude: Provide the longitude coordinate of the location for mapping purposes.
  11. Location Image: Click on the Upload Image button to add a relevant image for the location.
Step 6: Save the New Location

  1. After filling in all the required fields, click on the "Save" or "Add Location" button to finalize the addition of the new location.

Additional Note:

  • Ensure all entered details are accurate to provide customers with the correct information about the location.

This guide will help you successfully add a new location in Bookingor.

Updated on September 30, 2024

What are your Feelings

  • Happy
  • Normal
  • Sad

Share This Article :

  • Facebook
  • X
  • LinkedIn
  • Pinterest
Location HoursEdit Location

Your Valuable comments Cancel reply

Your email address will not be published. Required fields are marked *

*

*


Product
  • Demo
  • Features
  • Pricing
Best for
  • Salon Industry
  • Barber Industry
Resources
  • Documentation
  • Changelog
  • Contact Support
  • Blog
Company
  • About
  • Privacy Policy
  • Terms and Conditions
  • Refund Policy
  • Bookingor Affiliate Program
Bookingor
Bookingor is Wordpress Booking plugin and best Booking Appointment Scheduling plugin with Reservation. Fully customizable, allowing you to tailor it to your specific needs. Our plugin offers a range of features to meet your requirements. Developed under by The Creative Next.
ยฉ Copyright 2026 | Bookingor by The Creative Next | All Rights Reserved