How to Set Up a Free WordPress Booking Appointment and Scheduling System
In this guide, I will show you how to set up a free WordPress booking appointment and scheduling system in just a few minutes using the Bookingor plugin. Let's get started!
Installing the Bookingor Plugin
- Go to Your WordPress Dashboard
- Navigate to the Plugins menu and click Add New.
- In the search bar, type Bookingor and press Enter.
- Install and Activate the Plugin
- Once you see the Bookingor Plugin, click Install.
- After installation, click Activate to enable the plugin.
Setting Up Your Business Details
- Go to Bookingor Plugin > Business Profile
- Fill in the following details:
- Business Name: Enter your business name.
- Business Logo: Click Upload, select your logo, and click Use This Image.
- Business Description: Provide a short description.
- Business Website: Enter your website URL.
- Email: Add a business email address.
- Phone: Enter a contact number.
- Country & City: Select your country and city.
- First & Last Name: You can leave these blank if not required.
- Fill in the following details:
- Set Up Business Hours
- Adjust the working hours for each day.
- Toggle availability on or off for specific days.
- Click Save to apply the changes.
Adding a New Service
- Go to Bookingor Plugin > Services
- Click Add Service.
- Select a Category
- If the category field is empty, create a new category first by navigating to Bookingor Plugin > Categories.
- Assign the category to the service.
- Assign a Staff Member
- If no staff is listed, create one first in the Staff menu.
- Fill in the Basic Details
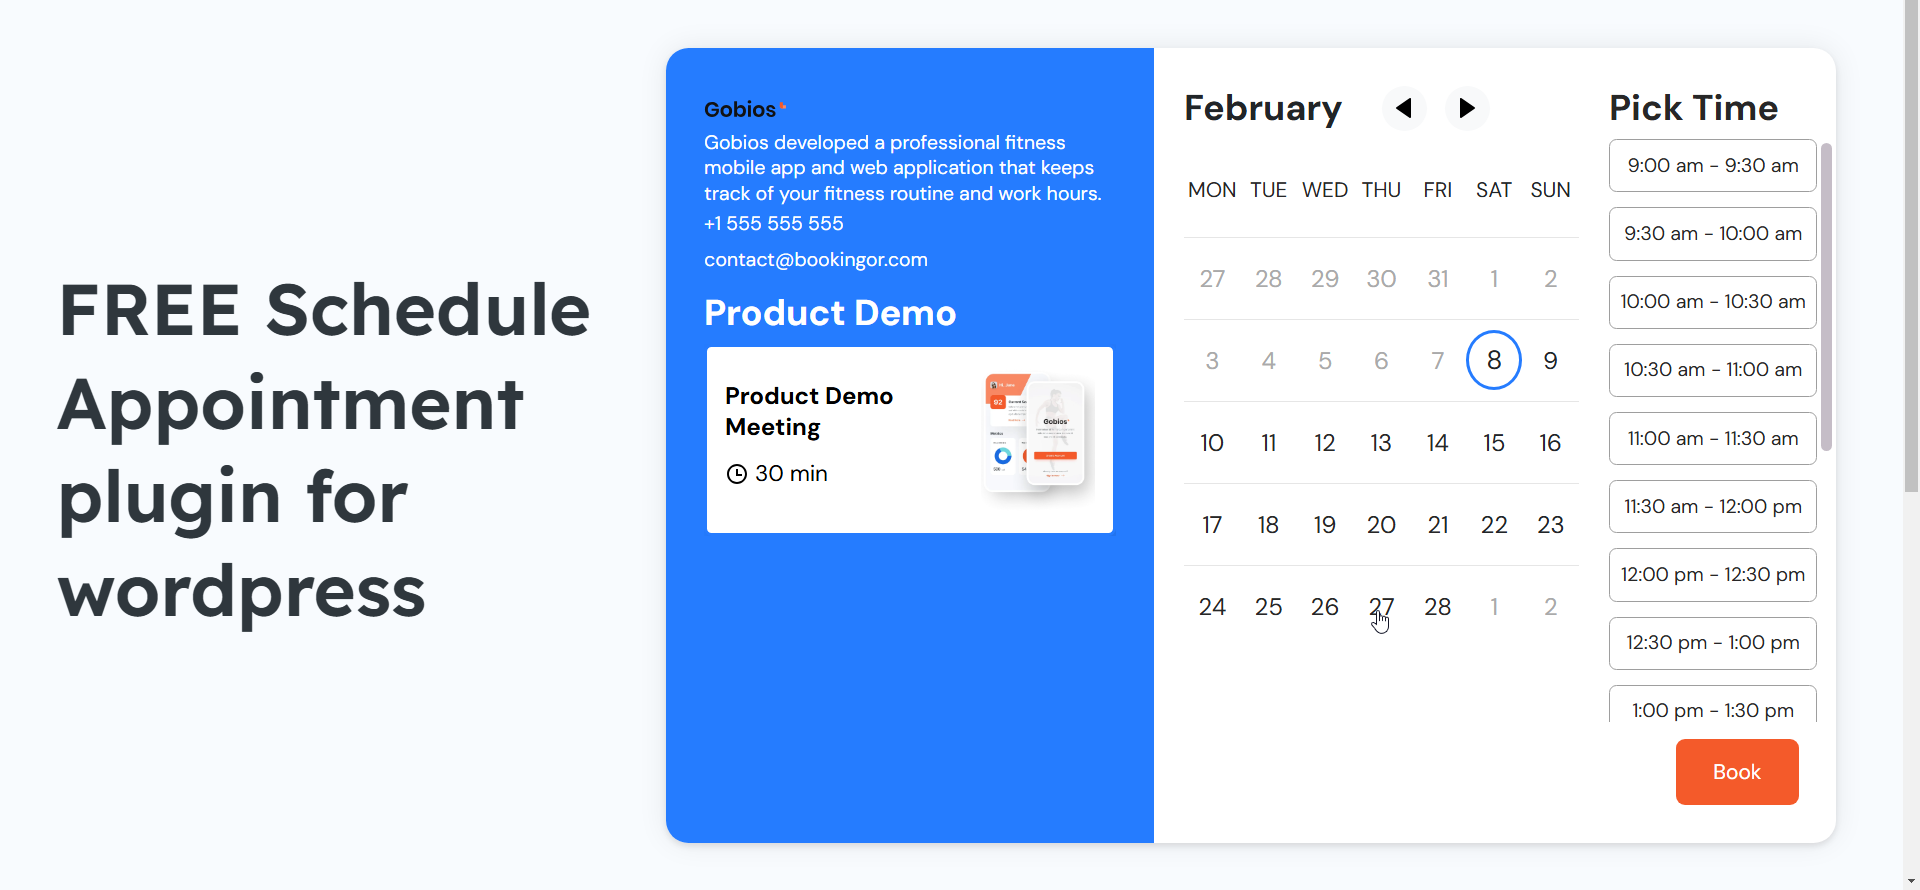
- Service Name: Enter a name (e.g., Product Demo Meeting).
- Service Description: Not available in the free version.
- Service Image: Click Upload, select an image, and click Use This Image.
- Set Pricing and Duration
- Cost: Enter the price ($0 for demo services).
- Currency: Change currency in Settings > Payment Tab.
- Duration: Set the service duration (e.g., 30 minutes). Select type (Minutes, Hours, Daily, Weekly, Monthly).
- Additional Settings
- Extra and Advanced Settings: Not available in the free version.
- Location: Assign a location if required. If no locations are listed, create one first in the Location menu.
- Click Publish to save the service.
Customizing Your Booking Template with Bookingor Live Editor
- Go to Bookingor Plugin > Styles Templates
- Choose from six different UI templates.
- Select a template and customize it using the Live Editor.
- Customize Design Elements
- Sidebar: Change the background color, text color, and service list text color.
- Fonts & Styles: Adjust hover effects, border color, and font family.
- Buttons: Modify the Book and Back button colors to match your brand.
- Adjust Booking Fields
- Service Section: Show/hide service price and description.
- Location & Staff Sections: Enable or disable these based on your needs.
- Business Details: Display logo, business description, phone, and email.
- Customer Information: Rename "Cart" to "Customer Information".
- Payment Settings: Turn off the payment option if the service is free.
- Final Confirmation: Update booking confirmation text (e.g., "Meeting Confirmed").
- Click Publish to save all changes.
Displaying Booking on Your Website
- Copy the Shortcode
- Go to Styles Templates and copy the shortcode of your selected design.
- Embed the Shortcode in Elementor
- Open the Schedule a Demo page.
- Click Edit with Elementor.
- Search for the Shortcode Widget and drag it to your desired section.
- Paste the shortcode and click Apply.
- Click Publish to save changes.
- Regenerate CSS for Elementor
- Go to WordPress Admin > Elementor > Tools.
- Click Regenerate CSS & Data.
- Click Save Changes.
Booking a Demo Appointment
- Visit the Booking Page
- Click Book.
- Fill in Customer Information.
- Select the Meeting Date and click Confirm Booking.
- Receive an Email Confirmation
- After booking, you will receive an email notification.
- To customize the email content, go to Bookingor Plugin > Notifications.
- Edit the Booking Approved email template as needed.
Managing Bookings and Customers
- Go to the Bookings Menu
- All booked appointments are stored here.
- Once a time slot is booked, it is no longer available for others to avoid double booking.
- Go to the Customers Menu
- View all customer information and booking details.
Conclusion
With Bookingor, setting up a free WordPress booking appointment system is quick and simple. You now have a fully functional booking system integrated into your website. For more features and customization, visit Bookingor.com. If you have any questions, feel free to comment on the video or check out the official documentation.